How to take Screen Shot on iPhone
Taking a screenshot on an iPhone is a handy way to capture and save information, share content with others, or document issues for troubleshooting. Depending on the iPhone model, the method to take a screenshot can vary. On iPhones with Face ID, such as the iPhone X and later models, you can take a screenshot by pressing the Side button and the Volume Up button simultaneously. For iPhones with a Home button, like the iPhone 8 and earlier models, pressing the Home button and the Side (or Top) button at the same time captures the screen. Once a screenshot is taken, it is saved in the Photos app, where you can edit, share, or delete it as needed.
1. Taking a Screenshot on iPhones (iPhone X and Later)
To take a screenshot on iPhones equipped with Face ID (iPhone X and later), follow these simple steps:
- Press the Buttons: Simultaneously press the Side button (previously known as the power button) and the Volume Up button.
- Release Quickly: Quickly release both buttons after pressing them.
- Preview Thumbnail: A thumbnail preview of the screenshot will appear in the bottom left corner of the screen. You can tap on this thumbnail to edit or share the screenshot, or swipe it left to dismiss it.
2. Taking a Screenshot on iPhones with a Home Button (iPhone 8 and Earlier)
To take a screenshot on iPhones with a Home button (iPhone 8 and earlier), follow these step-by-step instructions:
Step-by-Step Instructions
- Prepare the Screen: Open the app, image, or content you want to capture.
- Press the Buttons: Simultaneously press and hold the Home button (the circular button below the screen) and the Side button (or Top button) on your iPhone.
- Release Quickly: Quickly release both buttons. You should see a flash on the screen and hear a camera shutter sound, indicating that the screenshot has been taken.
3. Using Assistive Touch to Take a Screenshot on iPhone
Assistive Touch is an accessibility feature on iPhones that allows users to perform various tasks without using physical buttons. It’s especially helpful for individuals who have difficulty pressing buttons or prefer an alternative method for taking screenshots.
Enabling Assistive Touch
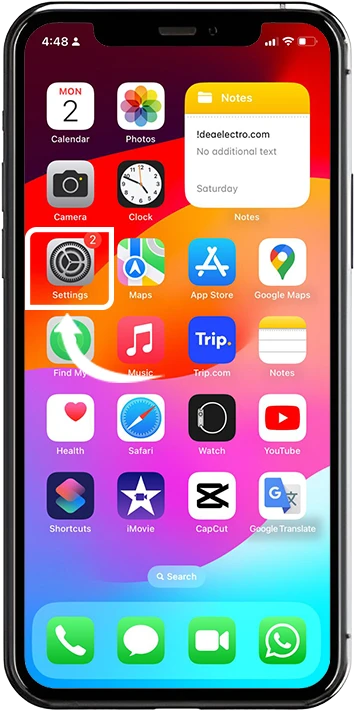
1. Open Settings: Start by opening the Settings app on your iPhone.
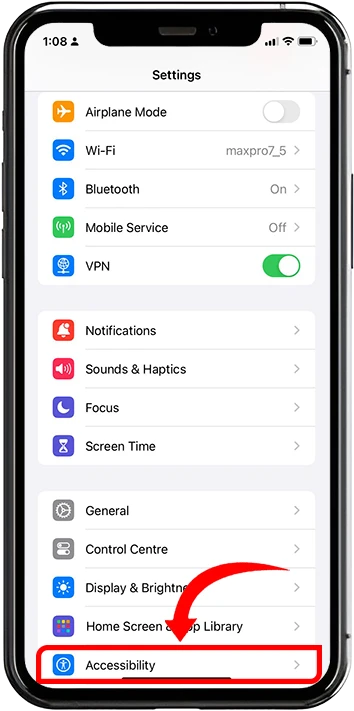
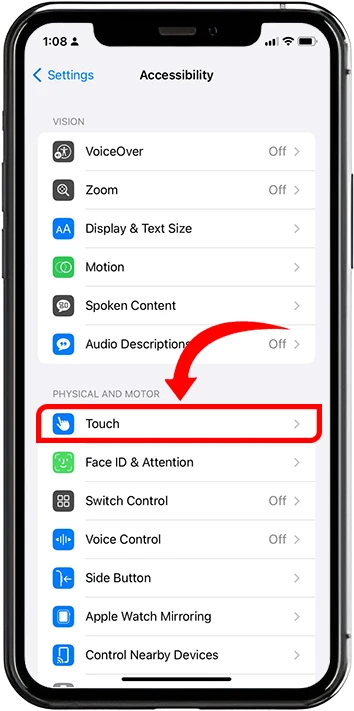
2. Navigate to Accessibility: Scroll down and tap on Accessibility.
3. Select Touch: Under the Touch
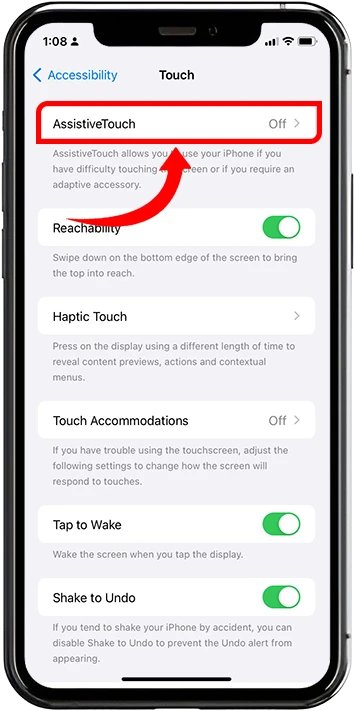
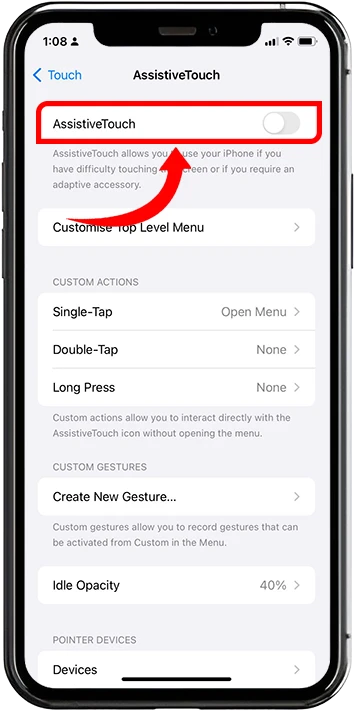
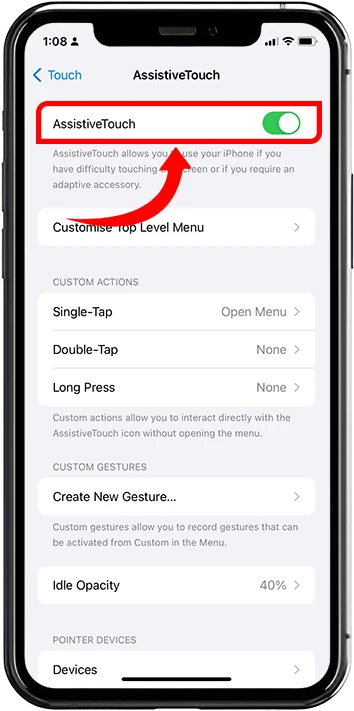
4. Enable AssistiveTouch: Tap on AssistiveTouch and toggle the switch to turn it on.
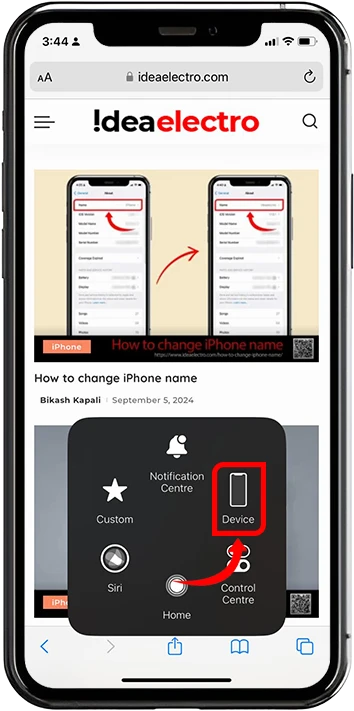
5. Activate AssistiveTouch Menu: A floating button will appear on your screen. Tap the floating AssistiveTouch button on your screen.
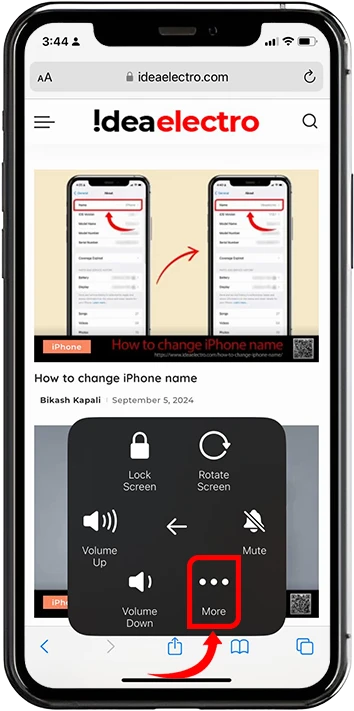
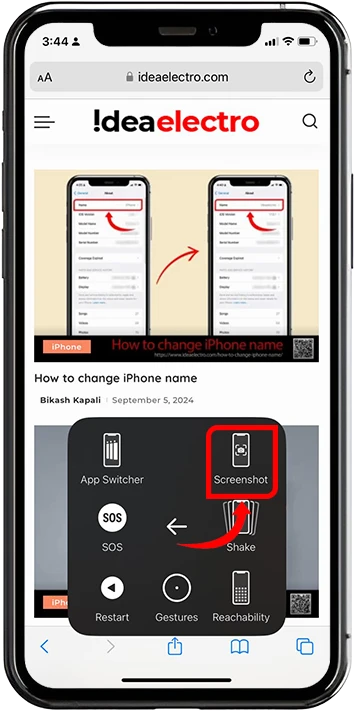
6. Select Screenshot: In the menu that appears “Device” tap in and tap “More” the Screenshot option will appear Tap it Your iPhone will capture the current screen.
4. Taking a Full-Page Screenshot on iPhone (Webpages and Long Content)
Full-page screenshots are incredibly useful for capturing entire webpages or long content that extends beyond the visible screen. This feature allows you to save the entire page as a single image or PDF, making it easier to reference or share comprehensive information.
Capturing a Full-Page Screenshot in Safari
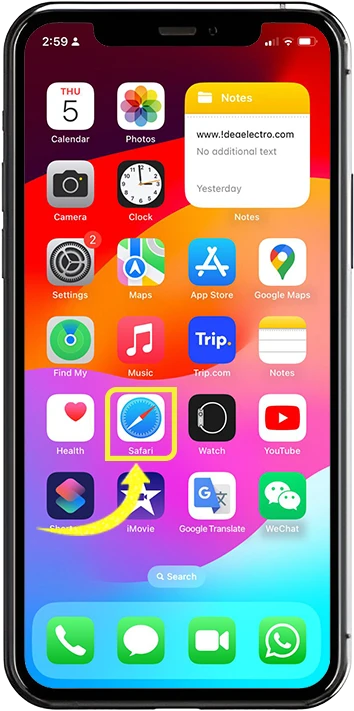
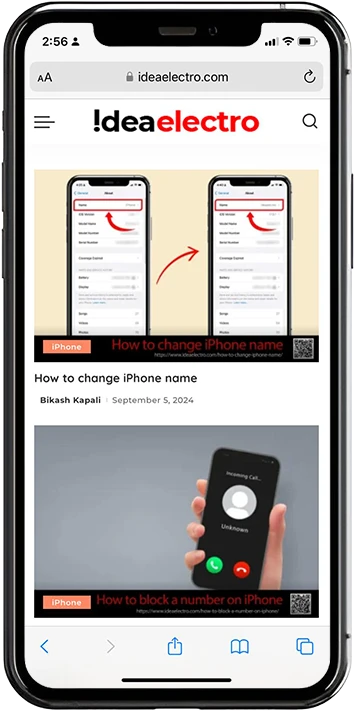
1. Open Safari: Launch the Safari browser on your iPhone and navigate to the webpage you want to capture.
2. Take a Screenshot: Use the standard screenshot method for your device
- For iPhones with Face ID: Press the Side button and Volume Up button simultaneously.
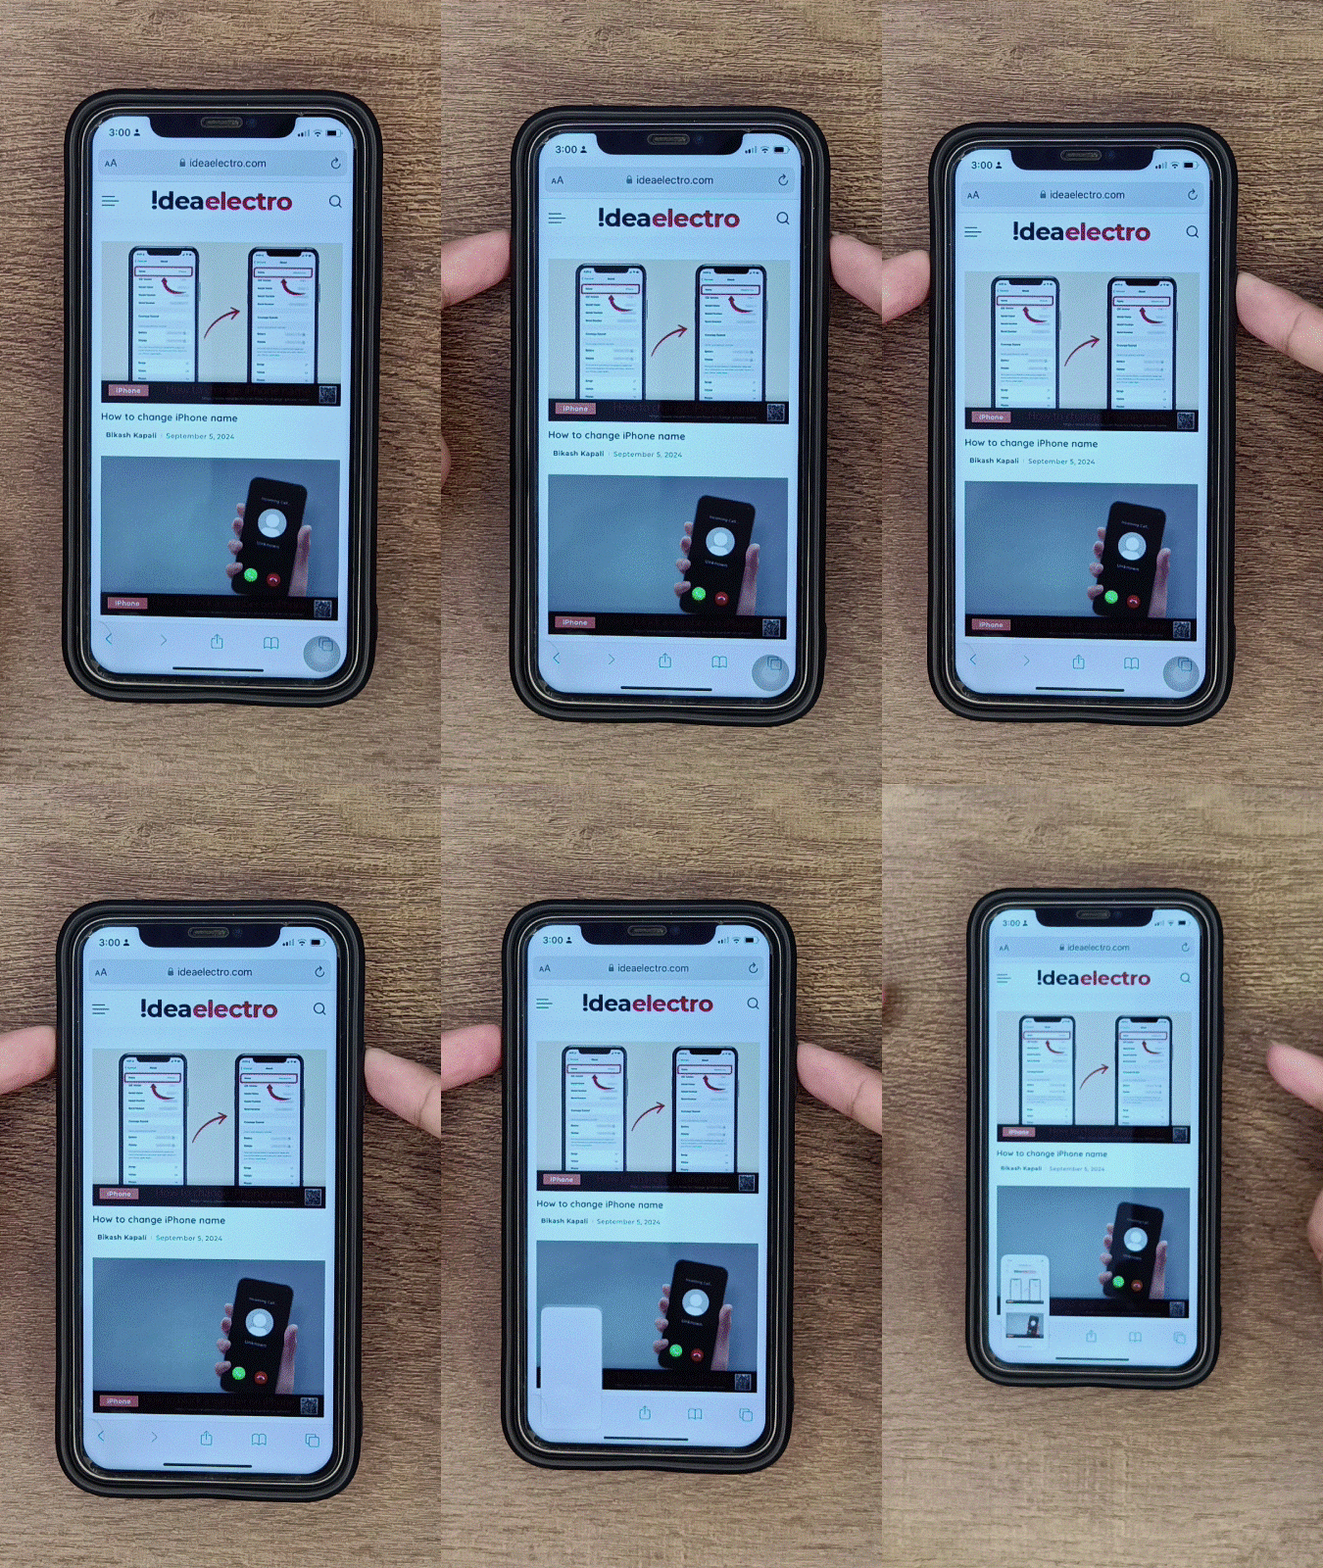
- For iPhones with a Home button: Press the Home button and Side (or Top) button simultaneously.
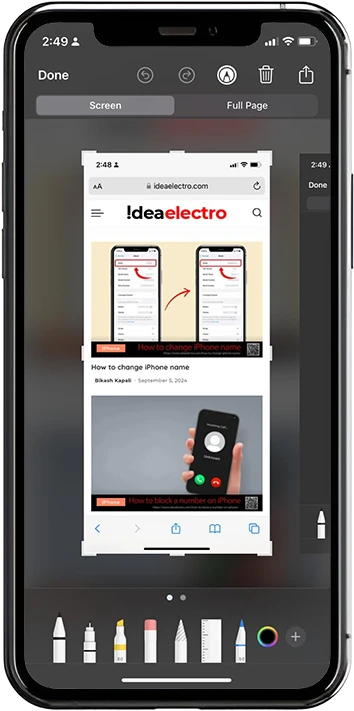
3. Tap on the Screenshot Preview: After taking the screenshot, a thumbnail preview will appear in the bottom left corner of the screen. Tap on this thumbnail before it disappears.
4. Select “Full Page” Option: In the screenshot editing interface, you will see two options at the top: Screen and Full Page. Tap on Full Page to capture the entire webpage.
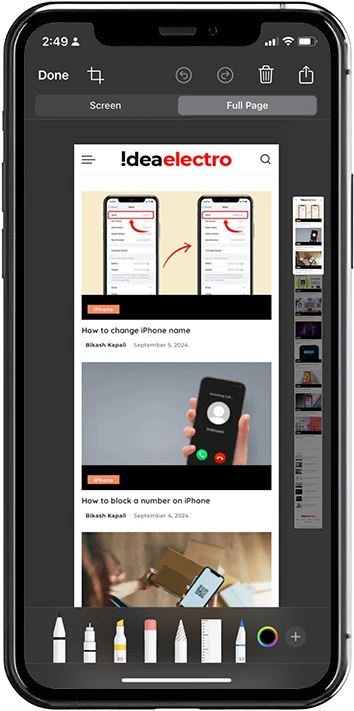
5. To save and view Fullscreen screenshot Tap on Done. You will get two options to save screenshot 1. Save to Photos 2. Save PDF to Files
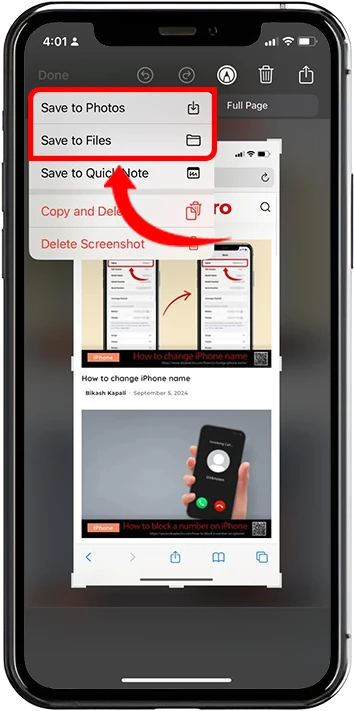
6. Also you have Copy and Delete option to copy screen shot, which does not save this image on photo album. (Example Paste in Notepad)
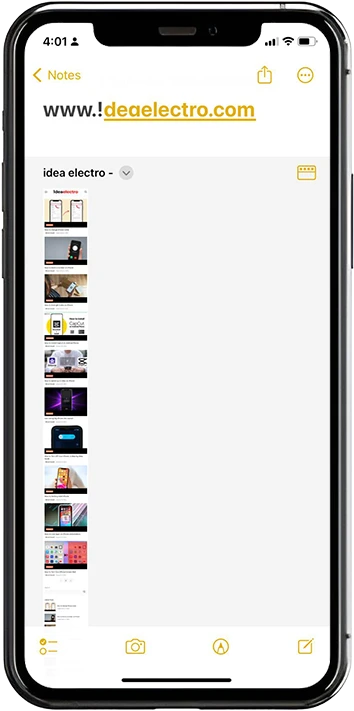
Managing and Editing Screenshots on iPhone
Once you’ve taken your screenshots, managing and editing them is straightforward. Here’s how to find, edit, and share your screenshots using the Photos app.
Where to Find Screenshots in the Photos App
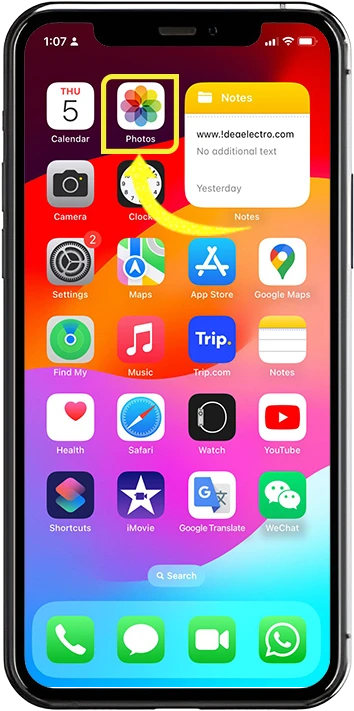
1. Open the Photos App: Locate and tap on the Photos app on your iPhone’s home screen.
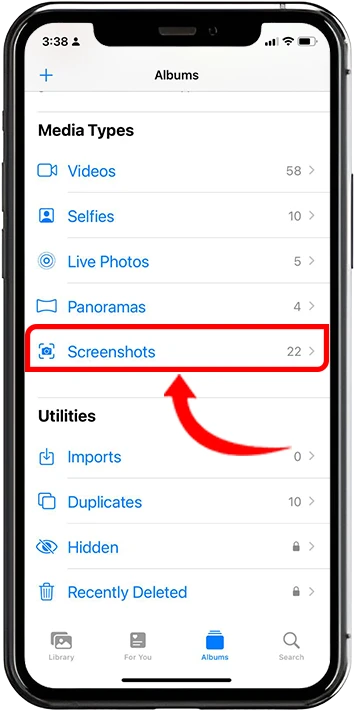
2. Find the Screenshots Album: Scroll down to the Media Types section, where you will see an album labeled Screenshots. Tap on it to view all your captured screenshots.
Basic Editing Tools Available
Once you’ve located your screenshots, you can easily edit them using the built-in editing tools:
- Select a Screenshot: Tap on the screenshot you want to edit.
- Tap Edit: In the top right corner, tap on the Edit button to enter the editing interface.
- Editing Tools:
- Crop: Use the crop tool to trim unwanted areas from your screenshot. Drag the corners or edges to adjust the frame.
- Markup: Tap the Markup icon (a pen tip) to draw, highlight, or add text to your screenshot. You can choose different colors and line styles for your annotations.
- Filters: Apply filters to change the look of your screenshot. Swipe through the options to see the effects in real-time.
- Adjustments: Use the adjustment tools to modify brightness, contrast, saturation, and more for a polished look.
- Save Changes: After editing, tap Done to save your changes.
Screenshot Sharing Options
Once you’ve edited your screenshot, sharing it is quick and easy:
- Tap the Share Icon: In the bottom left corner of the screen, tap the Share icon (a square with an upward arrow).
- Choose a Sharing Method: You’ll see various options for sharing your screenshot, including:
- iMessage: Send the screenshot directly to a contact via iMessage.
- Email: Share the screenshot through your email app.
- Social Media: Post the screenshot on platforms like Facebook, Twitter, or Instagram.
- AirDrop: Quickly share the screenshot with nearby Apple devices using AirDrop.
- Select Your Option: Tap on the desired sharing method and follow the prompts to complete the sharing process.

